
In-house innovation: Encapsulated acrylic channel letters
A guide to using encapsulated acrylic channel letters as a versatile sign solution
Developing versatile in-house solutions becomes paramount as sign businesses evolve to serve large-scope projects and build immersive environments. By leveraging existing equipment, businesses can introduce a product that meets the demands of modern design while keeping production in-house. This reduces reliance on outsourcing, enabling a swift response to client needs and market changes.
Encapsulated acrylic channel lettering is one of the latest products to take this approach. It enhances the ability to deliver customized solutions and focuses on creating unique and impactful experiences. Custom Sign Lab adopted encapsulated acrylic channel letters for this reason—driven by the need to maintain control over production pathways while expanding its capabilities.
What are they?
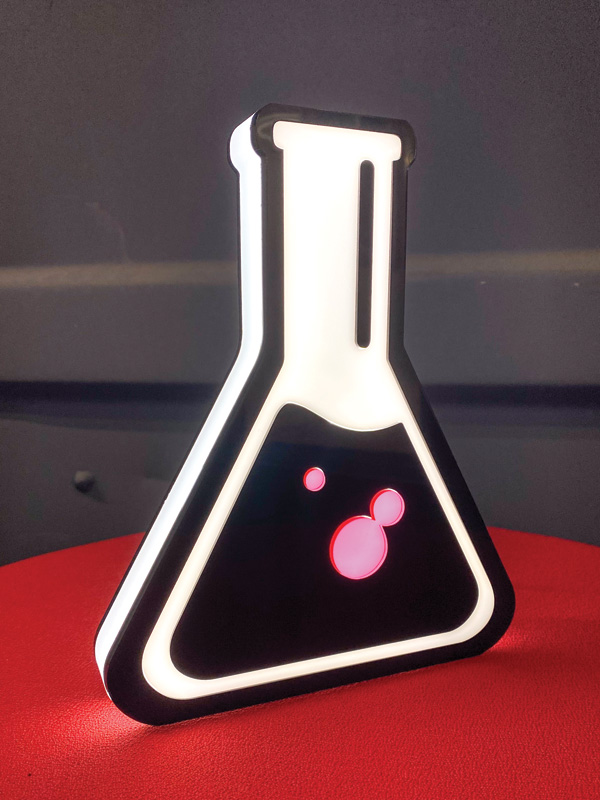
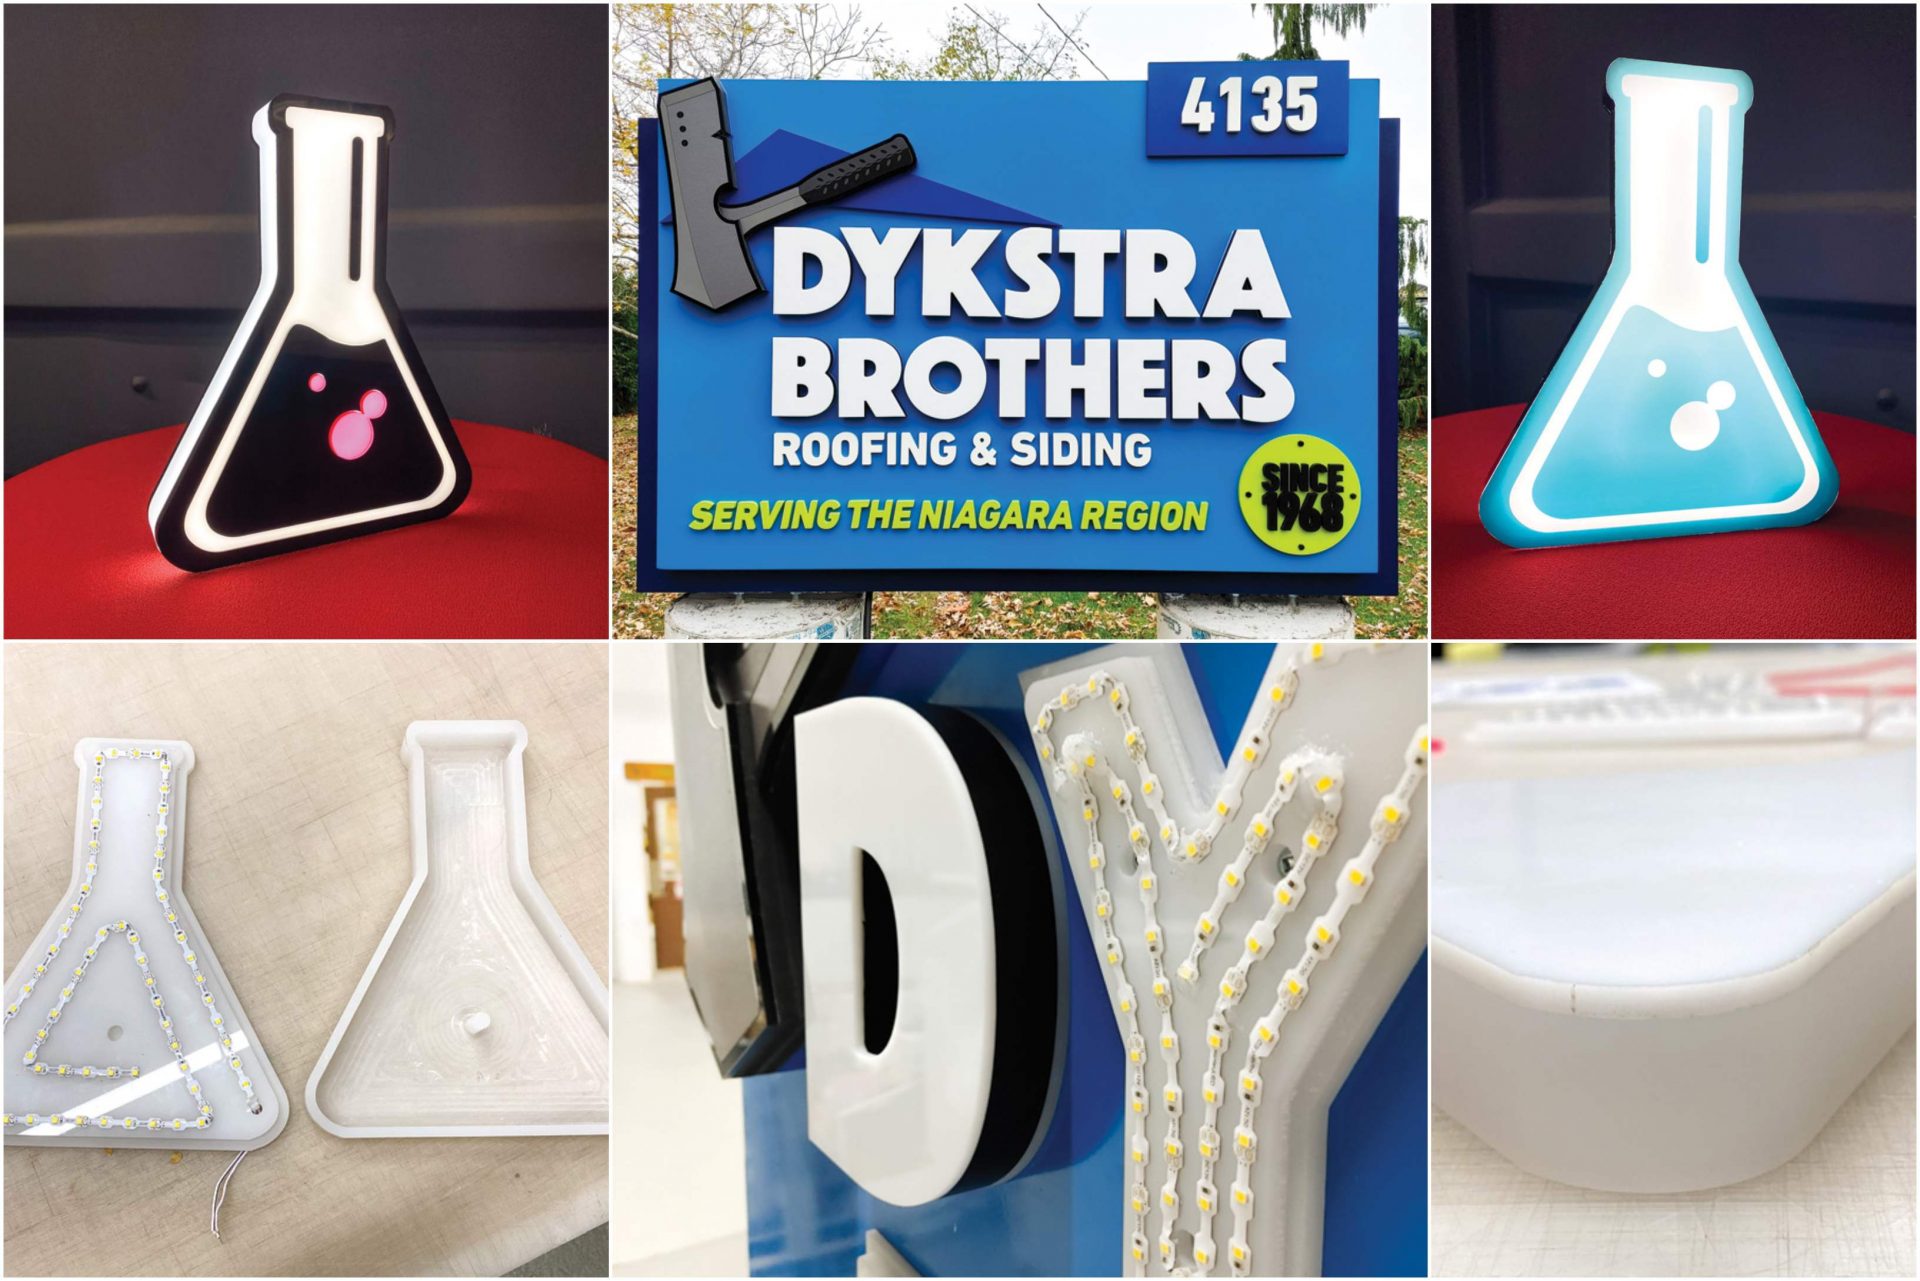
Encapsulated acrylic channel letters are a computer-numerical control-(CNC)-machined two-piece solid acrylic channel letter system with precision flat cuts. This product consists of two components: the face, referred to as Side A, and the backer, known as Side B. Side A can be machined from acrylic of any thickness starting from 19 mm (0.74 in.), allowing for a variety of overall final letter thicknesses. Meanwhile, Side B is typically machined from acrylic with a thickness of 10-12 mm (0.39-0.47 in.), providing a sturdy foundation. Side B may also be substituted with emulsion polyvinyl chloride (EPVC) for added versatility and lower cost if this section is not halo-lit.
With a CNC router table, a soldering iron, and a basic understanding of low-voltage lighting, one can achieve the same level of versatility and control in the production processes. This setup helps create a product that is a creative substitute for conventional channel lettering without spending a dime on new equipment or forgoing floor space for the footprint of bulky benders.
How do you set it up?
The machining setup for these files is straightforward, allowing for sharp outside corners and minimal design limitations. After finalizing the design, duplicate the outlines to create two file sets.
For file set “B,” when machining from 12 mm (0.47 in.) material, duplicate your shape(s) and offset the out-cut line by +6.4mm (0.25 in.). Note: As explained in the next section, this is 0.4 mm (0.015 in.) more than the cut for Side A. Then, program your cut file to follow the outside edge of this new line at a 6 mm (0.23 in.) depth, rounding corners to match your cutting bit’s radius (we often use 6 mm endmills, so our radius is 6 mm). Set the original out-cut line to a full depth of 12 mm (0.47 in.) or your machine’s through-cut depth.
Once complete, you will have a shape with a 6-mm finished edge and a 6-mm x 6.5-mm in-cut flange that aligns with Side A. If adding mounting points for screws, studs, or wire feeds, incorporate them in advance and cut to full depth. Side B can mount directly to the sign face or be studded for a standoff effect (for example, for shadow or halo glow). This method ensures a functional and esthetically flexible design for various installations.
For Side A (the face), we use 24-mm (0.94-in.) acrylic (as shown) and machine the letters in reverse. First, flip the vector shape before setting the cut paths.
As with Side B, duplicate the shape and inset it to match Side B’s cut. Since we have already accounted for a small tolerance (+0.5mm or +0.019 in.) for easy fitment, use a 6-mm (0.23-in.) inset instead. You may need to adjust this based on your equipment. Ensure the inner cut edge uses the same radius as your tooling, just like with Side B.
For Side A, remove all material inside the new cut line, maintaining a minimum of 4.5 mm (0.17 in.) letter face (6 mm is the recommended size). With 24-mm (0.94-in.) acrylic, this means removing 18 mm (0.70 in.) of material. This process can be slow with a smaller bit, so use large tooling when possible, switching to smaller bits only when needed. Always match the radius of your cutting tool.
Cut to the full material depth for the out-cut and run a cleaning pass for a smooth edge.
Production tip: On larger shapes, we sometimes add 6–10-mm (0.23-0.39-in.) stabilizing posts in the centre of Side A, with a corresponding divot in Side B (no more than 3 mm deep). To calculate post height, subtract the divot depth from the corresponding cut on Side A for a snug fit. These posts help stabilize the shape’s centre.
How do you finish?
Now that you have your two fabricated sections, it is time to move on to finishing. There are numerous factors to consider, but here are the three main elements.
You have several choices for Side A, which has an exposed face and sides, depending on whether or not to illuminate. The face can be illuminated in white or a single colour. For white illumination, applying a backlit white vinyl on the surface is advisable to conceal machining marks. Alternatively, you can cover the face with a printed backlit vinyl image or conceal the light with an opaque vinyl, paint, or an additional layer of cut acrylic or a substrate you choose.
For the sides of Side A, you can block out the light with high-quality vinyl (ensure to heat treat) or paint. Alternatively, if the letter is illuminated, this edge can provide a dramatic glow, adding an extra dimension to the design.
On Side B, only the 6 mm (0.23 in.) exposed edge is visible, which can either glow or be concealed. Depending on your material choice, you can achieve a rear halo effect using suitable translucent white acrylic.
What about lighting?
These letters can be easily illuminated and wired, making them versatile for various applications. At Custom Sign Lab, we use Hanley (Principal Sloane) Hellbender strip lighting, which is applied to the surface of the Side B component. This setup allows the lights to shine directly forward through the face and sides of Side A, creating a vibrant and eye-catching display. Additionally, the lighting reflects onto Side B, producing a stunning halo effect that enhances the overall visual impact.
Using red-green-blue (RGB) and programmable RGB flexible strip lighting opens a world of possibilities for dynamic lighting effects. With RGB lighting, you can achieve a broad spectrum of colours, allowing for bright, customizable displays that can change to suit different themes or branding requirements. Programmable RGB lighting takes this a step further, enabling you to create sequences and animations that add movement and interest to the signage. This flexibility makes encapsulated acrylic channel letters an attractive option for businesses looking to make a bold statement with their signage.
What about standards and safety?
Experimenting with the lighting volume based on the letter’s size and installing what is best for your application is essential. Once you have finalized the lighting setup, solder the leads or use quick-connects, then run them through the wire lead hole into Side B. This ensures a clean and efficient wiring process. Guaranteeing the lighting components meet relevant safety and quality standards is crucial, especially if the signage will be used in commercial or public spaces. We have had no issues having these letters Electrical Safety Authority-(ESA)-certified through a special inspection. Upon final assembly, you can seal the edges from water using a sparing amount of silicone, giving these an approximated Ingress Protection (IP)-65 rating. Always check with your region for specific electrical and certification requirements.
How do you install them?
Whether these letters are stud- or flush-mounted, you can apply your preferred installation method as you would for flat cut or channel lettering. It is crucial to ensure a safe and secure fitment to whatever surface you apply them to. First, install Side B, ensuring it is properly aligned and secured. Then, push Side A onto Side B. For a semi-permanent installation, use a thin bead of silicone. If you prefer a non-removable face, opt for your preferred permanent acrylic adhesive.
What else should you consider?
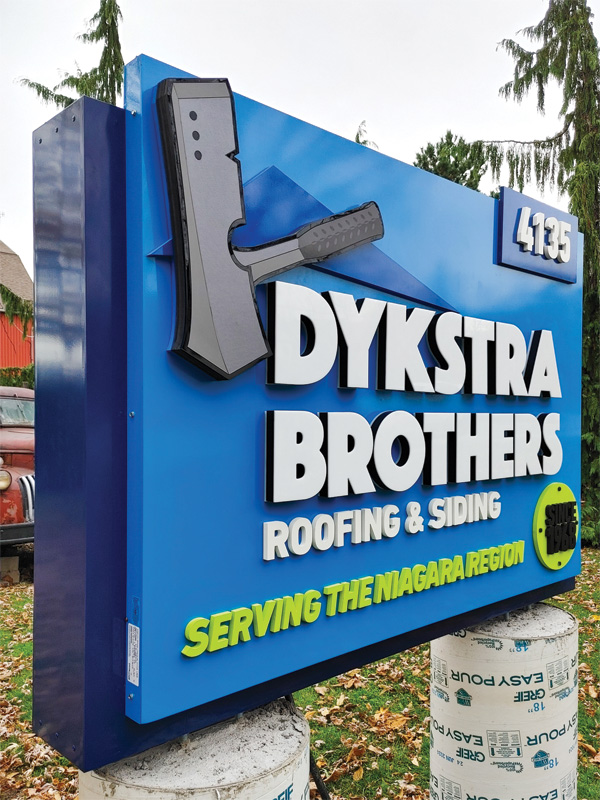
Encapsulated acrylic channel letters enable you to integrate the fabrication of versatile and re-configurable channel letters into your production pathway without adding any additional machines to your facility. These letters can be marketed as a premium solution for both interior and exterior channel lettering. The ability to mix and match lighting and edge finishes makes them desirable to most clients, offering a unique and customizable option that meets a wide range of design preferences and functional requirements. At Custom Sign Lab, these truly are minimal equipment, maximum versatility products that clients love.
Clayton Letourneau is an entrepreneur and the managing director of Custom Sign Lab, an experiential fabrication facility and a Niagara-based manufacturer of custom signage and brand activations. Letourneau oversees daily operations and ensures the smooth functioning of their customized manufacturing process. His role requires a deep understanding of materials, precise project management, and a commitment to delivering high-quality products that meet their clients’ unique needs.

Sign up for our newsletter
Featuring breaking news from Canada's sign and graphics industry.
Products

Read the Latest Issue
