
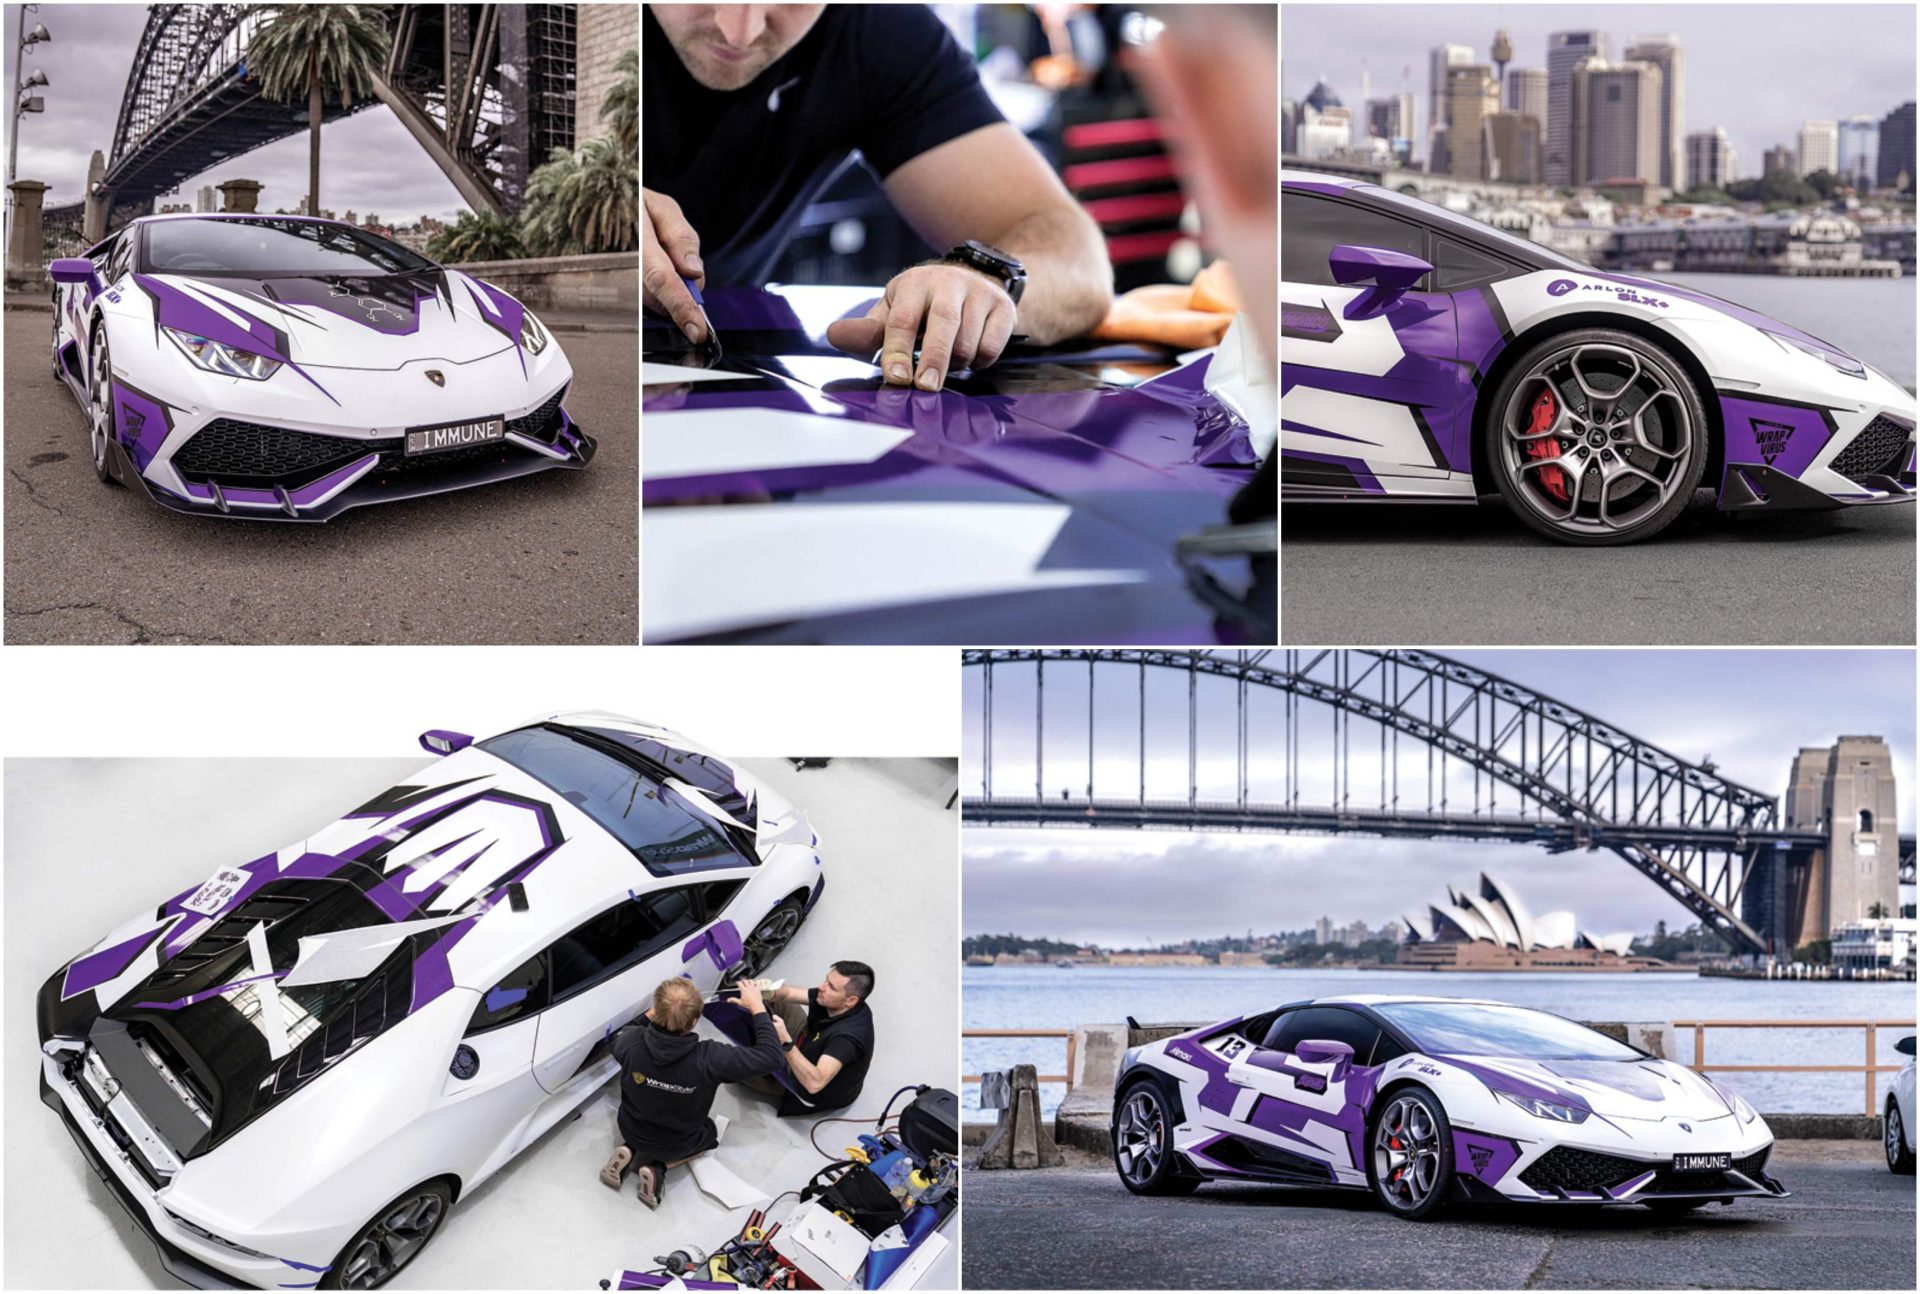
Cracking the wrap code: Prep and post-care strategies

When it comes to wrap installations, we almost always focus on the installation process itself, but we rarely talk about—or give proper importance to—what happens before applying the graphic and what happens right at the end, when the vehicle is fully wrapped. In this article, let us look at the things that can go wrong.
To better understand what we’re talking about, let’s break down the process and stages involved in a vehicle wrap:
| Planning → Design → Production → Preparation → Installation → Post-Heating → Inspection and Post-Care. |
In this article, we will focus on two specific stages, preparation and post-heating. But first, let’s briefly review all of them.
Planning
During this stage, decisions are made with the client to determine the scope of the wrap. Some of the key decisions made during this stage include:
- Budget: Depending on the client’s budget, the team will determine which proposal is most suitable.
- Coverage: Is the wrap partial or full? The outcome of this decision will determine the square footage of the project.
- Turnaround time: It is important to determine how much labour and how many working hours will be required.
- Wrap lifespan: Depending on the desired life expectancy, the film and laminate are determined. For example, a wrap can be produced using SLX+ with Series 3220; however, if extended durability is required, a polyurethane laminate such as Series V3370 can be used instead. The SLX+ is specifically designed for vehicle wraps and features Arlon’s crown jewel FLITE Technology.
Design
If you are a designer but not an installer, it is important to understand that you have the ability to define the relationship between. You have the power to make the installation process either a cakewalk or a nightmare. That may sound dramatic—but it’s true! Here are a few tips to help avoid issues:
- Keep text away from edges
- Maintain solid colours around door handles and lights
- Work with the natural lines of the vehicle’s body
- Use a vehicle outline file for your design, which helps achieve better placement.
Production
At this point in the wrapping process, we know the installation strategy. Some things to consider include:
- Choosing the correct material
- Using the proper print profile
- Determining the quantity, size, and orientation of panels
- Allowing the appropriate outgassing time before lamination
- Ensuring proper cutting and labelling of each panel, among other factors.
Installation
Topography-based adhesive systems (like SLX+) offer very light initial tack, which allows graphics to float over a substrate until firm pressure is applied. Its air egress system and the effortless liner release, to name a few of the features, increase the speed, efficacy, and quality of your work, making it ideal for large-scale projects, long panels, and solo applications. It allows for virtually unlimited repositioning during installation.
But don’t be mistaken—once the adhesive has “wet out,” it becomes extremely strong and reliable. It will stay down into deep channels without the need for primer, and stay tight around rivets, delivering long-term performance you can trust.

Inspection and post-care
Inspection: While it is not necessary to post-heat the entire vehicle, it is highly recommended to inspect the surface using a heat gun and heating the film to around 90–100 F (32–38 C).
What are we looking for?
When heat is applied, any trapped air or areas that were missed while squeegeeing will instantly appear as bubbles, micro-bubbles, or lines. It is important to know that if this occurs, the vinyl should be allowed to cool down before working the bubbles out.
Additionally, it is highly recommended to inspect:
– all edges
– corners
– trimmed areas
– any loose or unapplied vinyl.
Post-care
It is best to wash wrapped vehicles once every two weeks to maintain surface cleanliness. Wash the vehicle in the shade or avoid washing the vehicle while the body is hot or under direct sunlight. Using a soft sponge or a non-abrasive cloth, hand-wash the wrapped vehicle with car wash solution. Rinse off with water, then dry with a synthetic shammy or low-microfibre fabric. Gentle wiping of sensitive areas such as door handles, moldings, mirrors, and seams is highly recommended. When possible, store the vehicle in a garage or shaded area to reduce extended outdoor exposure.
Now, we can focus on what is an important stage in installation: Preparation and post-heating.
Preparation
Workspace cleaning: Cleaning the workspace is extremely important. We must remember that when the liner is removed, it can generate some static, which may attract dust or dirt particles to the adhesive exposed in the area. There are certain techniques to reduce this possibility, but without a doubt, the most effective one is to keep the floors, walls, and the workspace in general completely clean.
Temperature: There are two temperatures that must be kept under control when performing a vehicle wrap: ambient temperature and surface temperature. The ideal temperature is between 65–75 F (18-23 C), but this will not necessarily be the surface temperature. For this reason, it is necessary to allow the vehicle to sit in the workspace until it reaches ambient temperature. At this point, a decision should be made as to whether parts will be removed (headlights, taillights, door handles, etc.). If so, this time can be used to carry out that labour-intensive task.
Vehicle cleaning: The first step is to ask the customer to deliver the vehicle as clean as possible. Ideally, the vehicle should go through an automatic car wash at least 24 hours in advance, allowing enough time for any water trapped in hard-to-reach areas to fully dry.
Once the vehicle is in the workspace and at the proper temperature, it is time to perform an inspection to determine if there is any agent or coating that could repel the adhesive (wax, oil, grease, etc.).
If so, the cleaning process should be:
| Soapy water → Degreaser → Soapy water → Isopropyl alcohol mixed with water (50/50). |
If the vehicle has an existing wrap or decals that must be removed, and an adhesive remover is required, the process should be:
| Soapy water → Adhesive remover → Soapy water → Isopropyl alcohol mixed with water (50/50). |
If, on the other hand, the vehicle is in acceptable condition and only requires deep cleaning, then only soapy water and isopropyl alcohol mixed with water (50/50) are required.
It is important to take your time during the cleaning process and try to reach all crevices and hard-to-access areas of the vehicle. Any dirt or trapped water in these areas could lead to premature failure of the wrap.
Once the vehicle is completely clean, the next step is to protect all parts we wish to cover with tape (headlights, taillights, door handles, rubber seals, etc.). If knifeless tape is going to be used, this is also the time to apply it in the desired areas.
After following these steps, your application will be much more enjoyable, faster, more efficient, and successful.
However, even once the vehicle is fully wrapped, the job is not finished. There is a key step to ensure the application is completely successful, and that is post-heating and inspection.
Post-heating
This is an extremely important step. Once the vehicle is fully wrapped, it is essential to ensure that the adhesive achieves a 100 per cent bond with the surface. This process occurs naturally and generally takes about 24 hours, but there is a way to accelerate it using heat.
To perform post-heating, the first thing we need is a heat source. In this case, we recommend using a heat gun and heating the film to a temperature between 200–220 F (95–105 C). Once it reaches the desired temperature, pressure should be applied again by hand with a glove or a squeegee, depending on the area.
Frequently Asked Questions
- Why is post-heating so important?
There are four main reasons. We like to use a four-letter acronym to describe and make it easy to remember: SEAR.
S = Softening the adhesive, which makes it flow easier and speeds up the adhesion process.
E = Exposing any air trapped.
A = Anticipate the hottest temperature the film will undergo.
R = Relieve stress in some critical areas.
- Can I use a torch?
Technically, yes (if no other option is available), but it is not as efficient as using a heat gun. This is because, although a torch reaches high temperatures quickly, it is very difficult to control and maintain.
- Which areas should be post-heated?
All edges, seams, corrugations, rivets, deep channels, and any other stretched areas must be post-heated.
- Should I post-heat the entire vehicle?
No, only the areas mentioned in the previous answer should be post-heated. The rest of the vehicle will naturally achieve a 100 per cent bond over time.
As a side note, we want to add that post-heating should be complemented by proper techniques and should never act as a replacement for them. No amount of post-heating will keep a wrap in place if the film has been overstretched beyond its limits.
Once all steps have been followed, we can be confident that the client will be happy and that the wrap will reach its expected lifespan, looking good and free of issues.
Jon Cruz is a senior digital marketing specialist at Arlon. If you have questions, visit wrapitright.com to schedule a FREE one-on-one video call with Arlon’s Tech Solutions team at wrapitright.com or email us at techservice@arlon.com where we can answer all your questions and ensure that you’re set up for success.
Sign up for our newsletter
Featuring breaking news from Canada's sign and graphics industry.
Read the Latest Issue

